Turning a Closet into a Vocal Booth: The Benefits and Drawbacks of Small Spaces
How To Turn A Closet Into A Vocal Booth
A lot of people are looking for ways to turn a closet into a vocal booth. The reason for this is simple – many people don't have the money to invest in a professional vocal booth, and they want to find a way to make their home recording studio sound better. In this blog post, we will discuss the benefits and drawbacks of turning a closet into a vocal booth. We will also talk about how to properly treat the space with acoustic treatment, so that you can get the best possible sound from your vocals.
** Scroll to the bottom to see our video of a closet vocal booth conversion! **
Pros & Cons Of A Closet Vocal Booth Setup
One of the benefits of turning a closet into a vocal booth is that it is a very small space. This means that you will need less acoustic treatment and can focus on just the small area inside of the closet. The sound waves will bounce around less, and they will be more focused. This can lead to better sounding vocals, because there will be less echo and reverb.
However, one of the drawbacks of a small space are standing waves and the low end. If your closet has parallel walls that are close together then you can get some low end build up and standing waves inside of your booth. Don't worry, you can add treatment to help mitigate this problem.
Another drawback is that sometimes it can be difficult to keep the sound from leaking out or from getting in. If you are recording in a closet and just starting out you probably don't have the budget for decoupling the walls or extra drywall to properly stop sound transmission through the walls and ceiling. If you are interested in stopping the sound transmission check out this article here.
Otherwise, if you have a lot of outside noise near your home like planes, trains, and automobiles you will have to figure out the best time of day to record. Often this is early in the morning or at night, but may be different in your space. We used to live by the Purdue University Airport and would have to record at night after all the folks in pilot school were done practicing.
Now that we understand some of the benefits and drawbacks to a closet vocal booth lets talk about how we treat the inside of the closet to get it to sound better.
How do you treat a small closet to turn it into a vocal booth?
Mic Placement
The first thing is to figure out where you will place your mic, and where you will be positioned when speaking, singing, or rapping into the mic. Once you have your mic position figured out you can start to plan the acoustic treatment.
Reflection Points
The only sound source in the room will be the vocalist, so the main reflection point will be on the wall where your voice is traveling towards. This is why it's important to have the mic position figured out first, because you will want to place the acoustic treatment on the wall behind the microphone. This will help to absorb the sound that is reflecting off of that wall and will make your vocals sound more clear and focused.
There are also some other reflection points in the areas around the vocalist.
- The ceiling above the vocalist and the microphone
- The side walls next to the vocalist
- The floor underneath the vocalist

The ceiling and the side walls can be treated with acoustic panels. For the floor, you can use a rug. If you already have carpet in the closet then the floor is good to go. If you have hardwood floors then you will want to put down a rug to help absorb the sound.
Another spot to consider is the back wall of the closet. This is the wall that is opposite of the vocalist and the microphone. You can put acoustic treatment on this wall as well, but it's not as important as the other reflection points. If your closet is narrow and the vocalist may be absorbing the reflections that would make it to the back wall. If your closet is deep and the vocalist is far away from the back wall, then you may want to consider treating that wall.
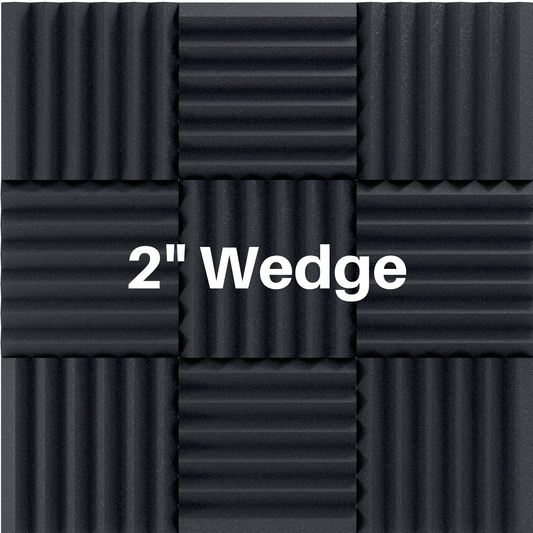
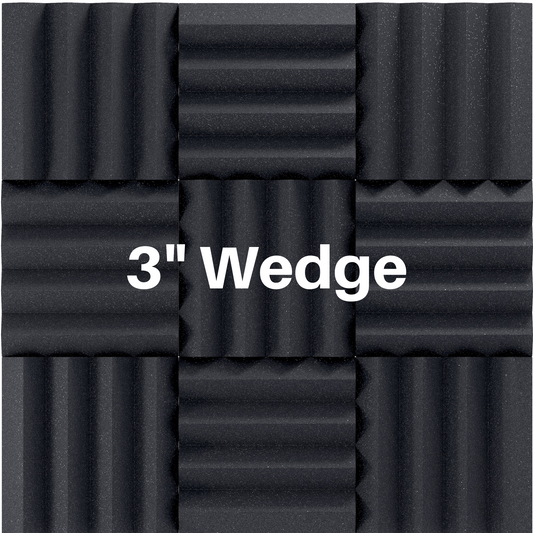
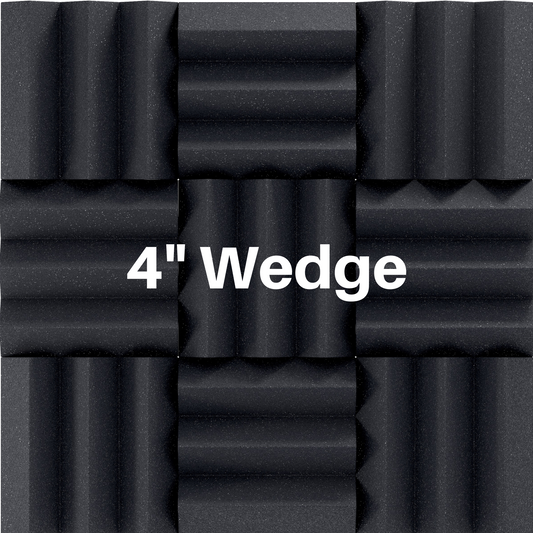
What thickness of acoustic foam should I use for a vocal booth?
The answer to this question depends on the size of your vocal booth. If you have a small closet then you may only need two-inch thick acoustic panels. If you have a larger space then you may want to consider four-inch thick acoustic panels. The thicker the acoustic panel, the more sound it will absorb and the lower the frequency it will absorb.
If your booth is super small and using 4 inch thick material will make it so you can't move then it makes no sense to use the 4 inch thick foam. If your booth is on the larger size then you may want to consider using the thicker foam to help with the low end. In general, most people will use two-inch thick acoustic panels for their vocal booths. It's a good balance of absorption and price.
Do you need bass traps in a vocal booth?
The answer to this question is maybe. Small vocal booths can sometimes suffer from standing waves and low end build up. This can be caused by the parallel walls in the small space. If your booth has parallel walls and you are noticing a problem with standing waves or low end then you may want to consider adding bass traps to your vocal booth. A couple bass traps in the upper corners of the space should be sufficient.
Closet Vocal Booth Conversion DIY
Check out this video we made of a DIY closet vocal booth setup idea.
Acoustic Treatments Used
- 2x12x12" wedge panels (24 pieces)
- 12x12x24" corner bass traps (2 pieces)
You can purchase this exact bundle for your own closet voice recording setup!
Click here -> Purchase the closet vocal booth bundle
Read More:
Portable Vocal Isolation Booth Design Plans DIY
What Is A Condenser Microphone & How Does It Work?