What Is A Reflection Free Zone (RFZ) In A Recording Studio?
Share
A reflection free zone (RFZ) is the area in your room around your listening position where no first reflection echoes will reach the listener. A RFZ is obtained by proper acoustic treatment of the first reflection points in your room.
One of the easiest ways to improve sound clarity in your recording studio is to treat your room's first reflections.
Treating first reflections is imperative because they are the most noticeable echoes and can seriously trick your ears! Not only are the first reflection echoes the most noticeable, but they can lead to further problems like comb filtering if left untreated!
Make life a little easier on your ears, and spend the time to learn how to create a RFZ for yourself!
In a professional mixing room or a home recording studio it is typical to have a two channel setup using a set of studio monitors. The main reflection points are on the back wall, side walls, ceiling and the front wall directly behind your monitors if they or not built into the wall.
In the below diagram you can see the reflection free zone in green.

Another thing to note in the diagram is that the speakers form an equilateral triangle with the listening position (blue triangle in above diagram).
Your right and left speakers should form an equilateral triangle with your listening position. Your monitors sound best when they are the same distance apart from each other as they are from you. Aiming your speakers at your listening point (toeing) can make a huge difference in the sound quality.
Monitor isolation pads are also used to angle speakers into more optimum listening positions. Speaker pads also help reduce vibration and absorb bass recoil providing you with the best sound your speaker can produce.
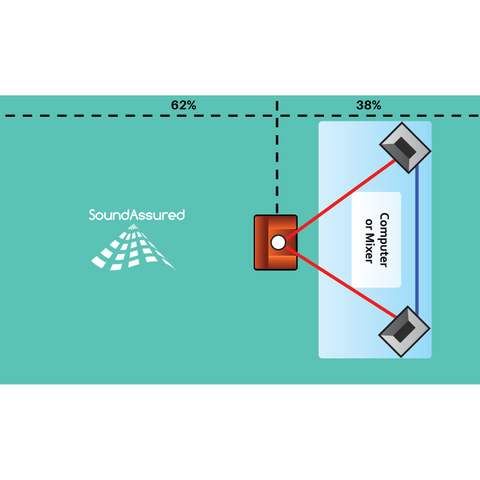
This concept is illustrated In the below diagram. The white dot is the listening position of the example room. The blue line is the same size as each red line.
Read More:
Acoustic Treatment For Home Recording Studios - Multiple Design Ideas
What Is Transmission Loss Of Sound ?
What Is Noise Reduction Coefficient (NRC) ?
