Drum Acoustics And Setting Up A Drum Room For Great Sound
Drums are a fascinating instrument, and their sound is created by a complex interplay of acoustics and physics. If you're a drummer, you're thinking about becoming one, or work with drummers, understanding how your drums produce sound can help you fine-tune your setup for the best possible results. In this post, we'll take a look at some of the basics of drum acoustics and explore how to set up a drum room for great sound. Whether you're just starting out or you've been playing for years, we hope you find something new and useful here!
How Do Drums Make Sound?
Drums produce sound when the membrane is struck by an object.
Drums make their signature sound whenever a membrane is hit with a stick, mallet, or even your hands. The force of the impact causes the material on the drum head to vibrate and produce waves that create what we know as sound. Depending on what kind of material is used for the head and what type of stick used to strike it, the sound produced can vary wildly. Whether you’re hitting it in short bursts or long rolls, drums are capable of producing some truly amazing sounds.

The type of drum, material of the membrane, and size of the drum all affect the sound it produces.
The type, material and size of the drum can all have a tremendous impact on the quality of sound it produces. Whether you are planning to jam out on a djembe or rock out with a bongo, each type of drum brings its own unique sound with it. This is largely because of differences in the size and thickness of their membranes, which influence the range of tones that can be produced by striking them.
Different membrane materials also contribute to this acoustic diversity, from calfskin heads that offer a low-end punch to plastic shells that provide brighter highs. In any case, all types of drums typically use a combination of these characteristics for their individual sound signature.
When you strike a drum, the membrane vibrates and produces sound waves that travel through the air.
The drum shell amplifies the sound by resonating with the drumhead. The sound waves produced by the vibrating drumhead cause the drum shell to vibrate. As the drum shell vibrates, it causes the surrounding air to vibrate, creating a louder sound. The waves from the drumhead and drum shell resonance cause the air surrounding the drum to expand and contrast while the sound waves move through the air towards the listeners ear.
The larger the drum, the lower the pitch.
The size and shape of the drum shell affects the sound produced. A larger drum will produce a lower frequency sound, while a smaller drum will produce a higher frequency sound. For example, the kick drum in a standard drum kit produces the lowest sound which has a lot of bass frequencies. This is because the kick drum is the largest drum in your kit.
Fun fact: The Marching Band of Purdue University touts one of the biggest drums. At a height of over ten feet (3 m) when the carriage is included, it is known by Purdue as the "World's Largest Drum".
The shape of the drum also affects the sound, with a cylindrical drum producing a different sound than a conical drum.
Also, an open-backed drum will allow sound to escape through the back, which can give the drum a different tone than a closed-backed drum.
Overall, the combination of the vibration of the drumhead, the resonance of the drum shell, the size, shape and the open or closed back design of the drum, allows the sound of the drum to be amplified and heard more loudly.

You can change the pitch of a drum by changing how hard you hit it and where you hit it.
Playing drums can be a lot of fun, but many people don't realize that there is a surprising amount of control you can have on the sound it produces. By changing how hard you hit it or where on the membrane you hit, you can manipulate the pitch. For example, by hitting the edge of the drum harder than the middle, you can get a higher pitched noise that is perfect for solos or accents. Similarly, if you want a lower pitch for the underlying rhythm of songs, just hit somewhere around the center with more force. Experimenting with these techniques is one of the best and most enjoyable ways to explore music theory!
Drums can be tuned, but most drums do not have a definitive musical note.
Unlike a guitar or piano where you can play specific notes like C, Bb, G#, etc, drums do not carry a specific musical note. Frame drums like the drums in a drum kit do not have specific pitches. Only certain tuned drums like Tabla's are tuned to specific pitches.
With most drums the drumhead vibrates at the same frequencies corresponding to the modes of vibration of a stretched membrane.
Longitudinal modes: Longitudinal modes are the most common mode of vibration in a drum. These occur when the drumhead vibrates back and forth along its axis, creating pressure waves that travel down the drum's body. These pressure waves bounce back and forth between the drumhead and the drum's walls, creating standing waves that resonate at certain frequencies.
Radial modes: Radial modes occur when the drumhead vibrates in a circular motion, like ripples on the surface of a pond. This mode of vibration is less common in drums, but it can occur in smaller drums or drums with thicker drumheads.
The diagram below shows the first 12 modes of vibration of a drum. The nomenclature (a,b) where "a" represents the number of Longitudinal Modes and "b" represents the number of Radial Modes. The number below each diagram represent the ratio of modal frequency to the ratio of the lowest mode. This is important because you can use this number to make predictions. If you have a drum with a frequency of 100Hz for (0,1) you can expect the (1,1) to be 319Hz because 200 x 1.594 is 318.8.

Now that we understand how drums make their sound, let's talk about acoustic treatment for a room where drums will be played.
Acoustic Treatments For A Drum Room
The importance of acoustical treatment for a drum room.
Acoustical treatment is important for a drum room because drums are loud instruments that produce a wide range of frequencies. Without proper treatment, the sound from the drums can reverberate and reflect off the surfaces of the room, causing echoes, standing waves, and other acoustic problems.
These issues can make it difficult to hear the individual components of the drum kit, which can impact the quality of the sound being produced. Acoustical treatment can help to mitigate these problems by absorbing, diffusing, or reflecting the sound waves in a way that creates a more balanced and controlled listening environment.

What problems can acoustic treatment solve?
Acoustical treatment can solve a variety of problems in a drum room, including:
-
Excessive reverberation: This occurs when sound waves bounce off the walls, floor, and ceiling and continue to reverberate in the room for a longer time than desired. It can cause a muddy, indistinct sound and can make it difficult to distinguish between different elements of the drum kit.
-
Standing waves: These are specific frequencies that resonate in the room and can result in certain frequencies being boosted while others are canceled out. This can cause uneven sound quality and can make it difficult to hear individual components of the drum kit.
-
Flutter echoes: These are rapid repetitions of sound waves that occur between parallel surfaces in the room. They can create a distracting and unpleasant sound, making it difficult to hear the drum kit clearly.
-
Outside noise: This includes sounds from outside the drum room, such as traffic or other instruments being played in nearby rooms. Or, the sound of your drums bugging your neighbors.
By addressing these problems, acoustical treatment can create a more controlled, balanced, and pleasant listening environment in a drum room.
How do you asses your drum rooms acoustics?
Assessing your drum room's acoustics is an essential step before applying any acoustical treatment, as it allows you to identify the specific acoustic problems that need to be addressed. Without this analysis, it can be challenging to determine the most effective type and amount of treatment needed to optimize the sound quality in your drum room.
To conduct an acoustical analysis of your drum room, you can follow these steps:
-
Use a sound level meter or an audio analysis software to measure the frequency response and decay time of the room. One of the softwares we recommend is Room EQ Wizard (REW). You can send us your REW scans and we can help you interpret the results.
-
Play a drum kit in the room and listen for any acoustic problems, such as excessive reverberation, standing waves, or flutter echoes. Your ears will tell you a lot about the room.
-
Locate any parallel surfaces that could cause standing waves or flutter echoes.
-
Use an omnidirectional speaker and a measurement microphone to generate test signals and capture the room's impulse response. This is a more advanced technique and requires some equipment.

Some of the common problems that you might encounter during your analysis include:
-
Resonant frequencies: These are specific frequencies that are amplified in the room, causing certain notes to sound louder and more resonant. Learn to calculate resonant frequencies here.
-
Dead spots: These are areas in the room where sound waves cancel each other out, resulting in a loss of sound quality.
-
Reflections: These occur when sound waves bounce off surfaces in the room, causing echoes and reverberation.
Need help with your drum room? Fill out a free room analysis.
What type of acoustic treatment are good for drums?
There are three main types of acoustical treatment that can be applied to a drum room: absorption, diffusion, and bass traps.
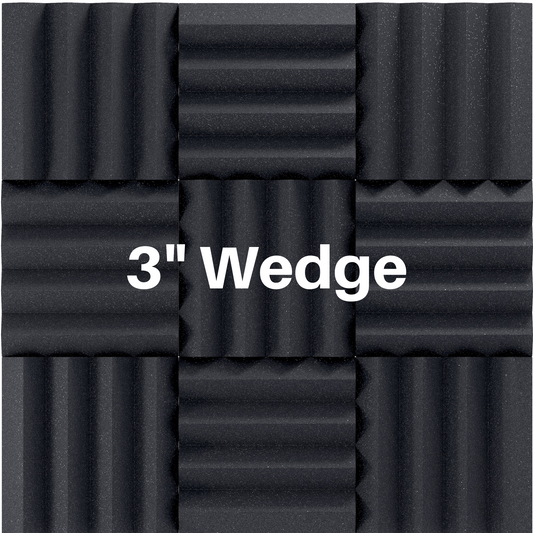
- Absorption: This type of treatment is used to reduce the amount of sound waves that are reflected back into the room. Absorption materials, such as acoustic foam or polyester, are made of porous materials that convert sound energy into heat, effectively reducing the sound waves' intensity. This type of treatment is effective for controlling excessive reverberation and eliminating echoes. Examples of absorption treatment include:
- These are made of materials such as fiberglass, rockwool, or foam and can be placed on walls, ceilings, or floors. They absorb sound waves and can be used to reduce the amount of echo and reverberation in a room.
- Diffusion: This type of treatment is used to scatter sound waves in different directions, eliminating echoes by scattering the sound waves. Diffusers are designed to break up sound waves and spread them out more evenly throughout the room. Diffusion is effective for controlling flutter echoes and creating a more natural, spacious sound.
- Bass traps: These are similar to acoustic panels but are designed to absorb low-frequency sound waves. They can be used to control standing waves and improve the bass response of a room.

By combining these different types of treatment, you can create a balanced and controlled listening environment in your drum room.
Where to place drums in a room for recording and best sound?
Here are some tips for applying acoustical treatment to your drum room:
Placement of acoustic panels and bass traps:
The placement of your acoustic panels and bass traps is crucial for achieving the desired sound quality. Generally, acoustic panels should be placed on the walls and ceilings where sound waves are likely to reflect. Bass traps should be placed in corners, where standing waves are most common. For best results, use a combination of both types of treatment. It's also essential to space the panels out appropriately, ensuring that they are evenly distributed throughout the room.
Determining the optimal amount of treatment:
The amount of treatment required will depend on the size and shape of your drum room, the type of music you play, and your personal preference. As a general rule, you should aim to cover between 25-50% of your walls and ceilings with acoustic panels, and at least two bass traps per corner. To determine the optimal amount of treatment, you can use an acoustical analysis software or fill out a free room analysis.

Tips for optimizing the acoustical treatment in your drum room:
- Ensure that your acoustic panels and bass traps are of high quality and you have enough treatment. Avoid thin cheap acoustic panels made overseas. Plastering your wall with 1" thick acoustic foam will cause more problems that it will solve.
- Try different combinations of absorption, diffusion, and bass traps to find the best sound quality for your needs. If you want a more lively sounding room try more diffusion than absorption. If you want more sound clarity and crispness, opt for more absorption.
- Consider the orientation of your drum kit in the room, as this can affect the sound quality and the effectiveness of your acoustical treatment. Move your kit around in the room and see if you can find a "sweet spot" where it sounds best.
In summary, applying acoustical treatment to your drum room is an effective way to improve its sound quality and create a more controlled listening environment. By following these tips for placement, determining the optimal amount, and optimizing your acoustical treatment, you can achieve the desired sound quality for your drum room.
If you need help treating your drum room we would be happy to help! Book a FREE CONSULTATION today!


2 comments
Thank you for sharing this insightful post. I found it to be engaging and informative, and I appreciated the unique perspective that you offered. Keep up the excellent work.
great resource for drummers and recording engineers alike, providing helpful tips on how to improve the acoustics of your drum room. It covers everything from soundproofing and acoustic treatment to mic placement and tuning. As someone who has struggled with recording drums in the past, I found this blog to be very informative and useful.